Mastering the Art of Excel Calendars: From Simple to Sophisticated
Related Articles: Mastering the Art of Excel Calendars: From Simple to Sophisticated
Introduction
With enthusiasm, let’s navigate through the intriguing topic related to Mastering the Art of Excel Calendars: From Simple to Sophisticated. Let’s weave interesting information and offer fresh perspectives to the readers.
Table of Content
Mastering the Art of Excel Calendars: From Simple to Sophisticated
Microsoft Excel, often perceived as a mere spreadsheet program, offers surprisingly powerful tools for creating customized calendars. Whether you need a simple monthly view for personal use or a complex, multi-year planner for project management, Excel provides the flexibility to meet your needs. This comprehensive guide will walk you through creating various types of Excel calendars, from basic to advanced, equipping you with the skills to design the perfect calendar for your specific requirements.
Part 1: Building a Basic Monthly Calendar
The simplest approach involves leveraging Excel’s built-in formatting and date functions. This method is ideal for quick, personal calendars.
Step 1: Setting up the structure:
-
Start with the date: In cell A1, enter the first day of the month you wish to display (e.g., "1/1/2024"). Ensure your system’s date format is set to your preference (e.g., mm/dd/yyyy, dd/mm/yyyy).
-
Generate the days: In cell A2, enter the formula
=A1+1. This adds one day to the date in A1. Copy this formula down to cell A7 (or further, depending on the number of days in the month). Excel will automatically increment the dates. -
Creating the week structure: To arrange the days in a week-based format, you’ll need to create columns for each day of the week. In cells B1 to G1, enter the days of the week (Sun, Mon, Tue, Wed, Thu, Fri, Sat).
-
Positioning the days: Carefully copy the dates from column A and paste them into the appropriate cells under the corresponding days of the week. You may need to manually adjust the placement of the dates based on the starting day of the month.
Step 2: Formatting for visual appeal:
-
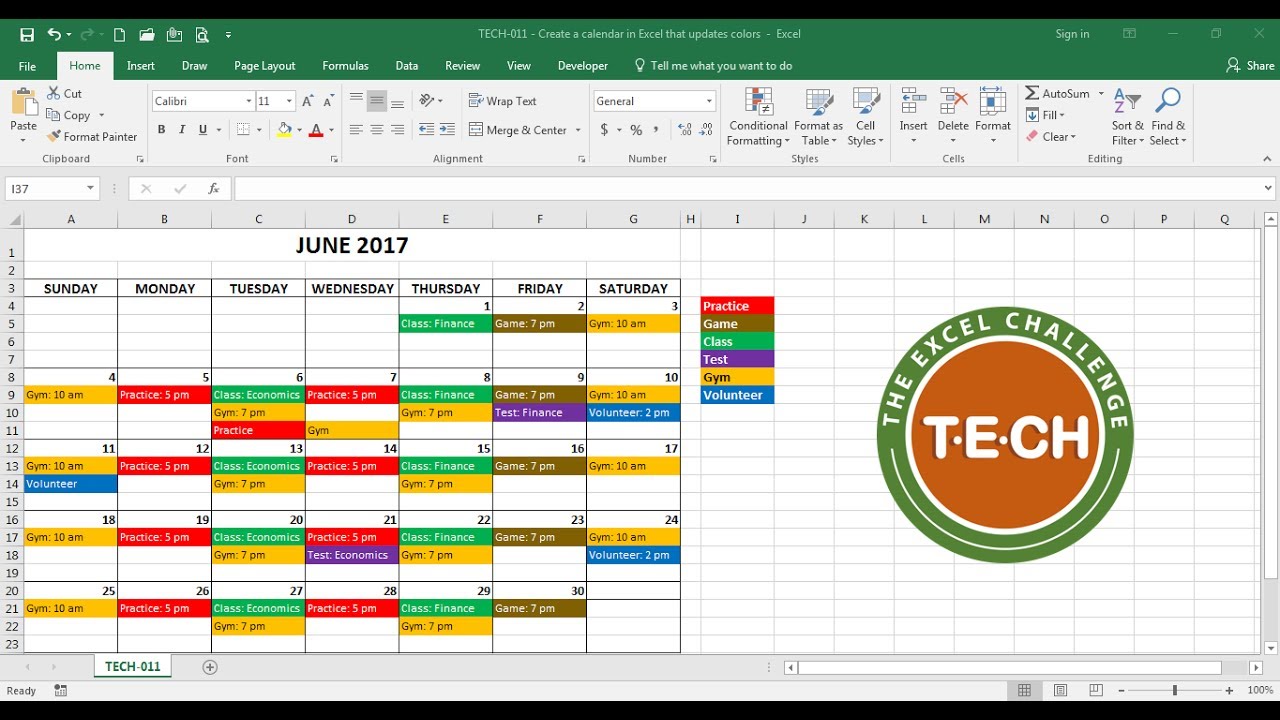
Borders and shading: Apply borders to the cells to create a clear grid structure. Use shading to differentiate weekends from weekdays. You can use conditional formatting for this (Home > Conditional Formatting > Highlight Cells Rules > More Rules… > Use a formula to determine which cells to format). A simple formula for highlighting weekends could be
=WEEKDAY(A2,2)>5. -
Font and alignment: Choose a clear, legible font and center-align the dates within the cells for a neat appearance.
-
Adding month and year: In a separate cell (e.g., A10), use the
TEXTfunction to display the month and year. For example,=TEXT(A1,"mmmm yyyy")will display "January 2024" if A1 contains "1/1/2024".
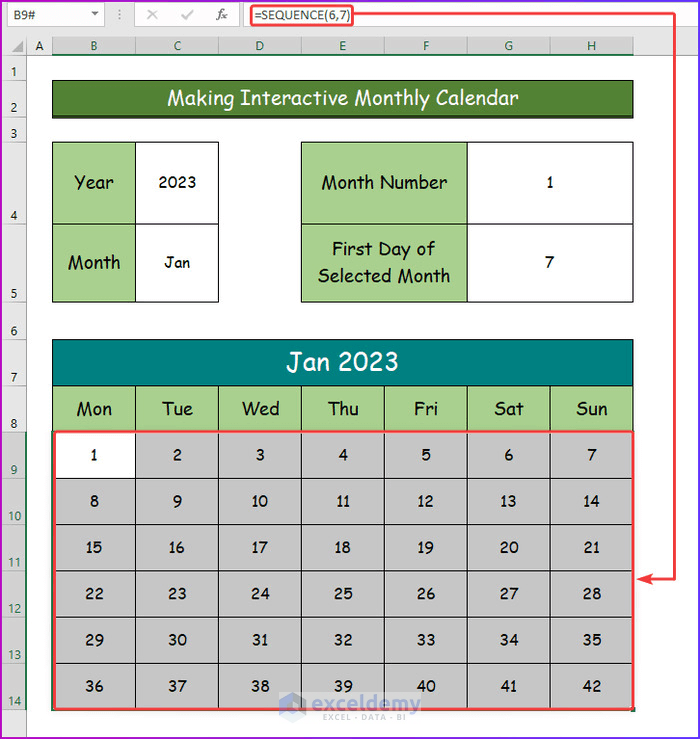
Part 2: Creating a More Advanced Calendar with Formulas
This section demonstrates building a calendar that automatically adjusts for varying month lengths and starting days, eliminating the manual placement required in the basic method.
Step 1: Determining the first day:
-
Start date: In cell A1, enter the first day of the year (e.g., "1/1/2024").
-
Day of the week: Use the
WEEKDAYfunction to determine the day of the week for the first day of the month. The formula=WEEKDAY(A1,2)returns a number from 1 (Monday) to 7 (Sunday). -
Offset for starting day: This number determines how many empty cells you need before the first day of the month.
Step 2: Generating the dates:
-
First day placement: In the appropriate cell (based on the
WEEKDAYresult), enter the formula=A1. -
Subsequent days: In the cell to the right, enter
=IF(ISBLANK(A2),"",A2+1). This formula checks if the previous cell is empty; if so, it leaves the cell blank; otherwise, it adds one day to the previous date. Copy this formula across the row and down subsequent rows. -
Month and year display: Use the
TEXTfunction as described in Part 1 to display the month and year.
Step 3: Handling month transitions:
-
Days in the month: Use the
DAYfunction to determine the number of days in the month. For example,=DAY(EOMONTH(A1,0))returns the number of days in the month represented by A1. -
Conditional formatting: Use conditional formatting to highlight the last day of the month and to ensure that no dates spill over into the next month.
Part 3: Advanced Calendar Features
Excel’s capabilities extend beyond simple monthly views. Here are some advanced features you can incorporate:
-
Multiple Months: Create a calendar displaying multiple months side-by-side by repeating the formula-based approach from Part 2 for each month.
-
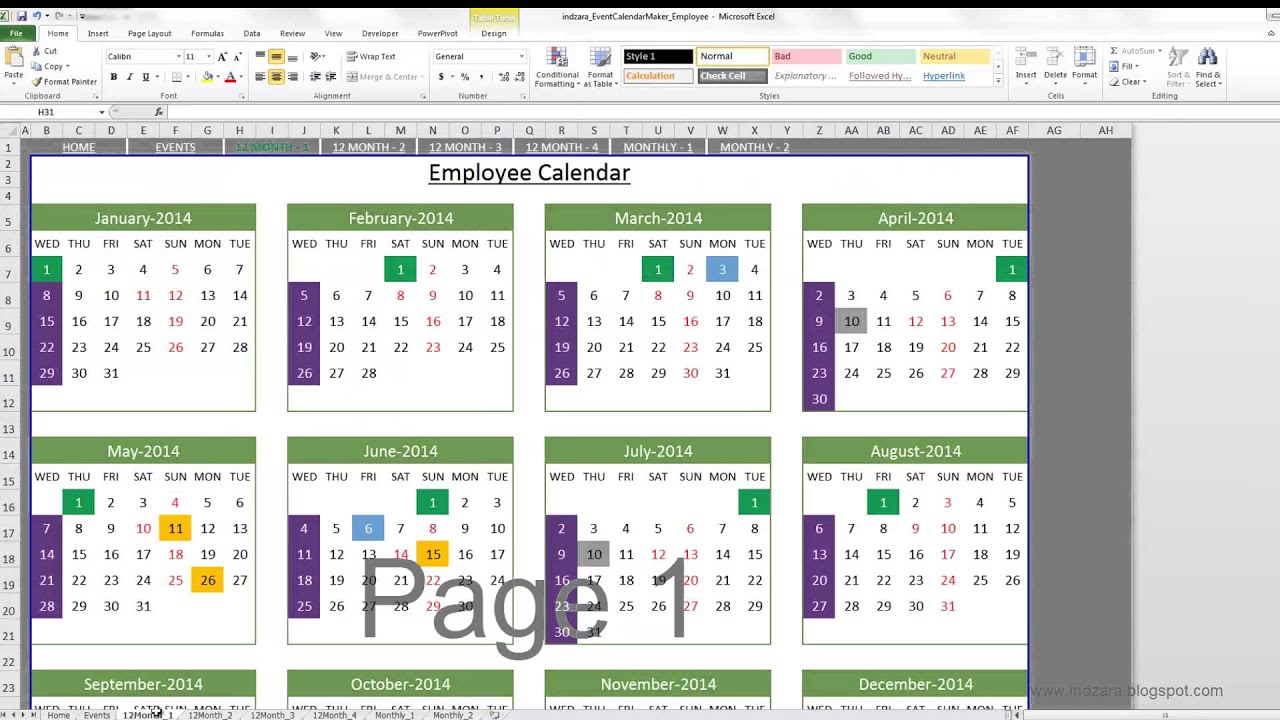
Year-at-a-Glance: Extend the multiple-month approach to create a calendar showing the entire year.
-
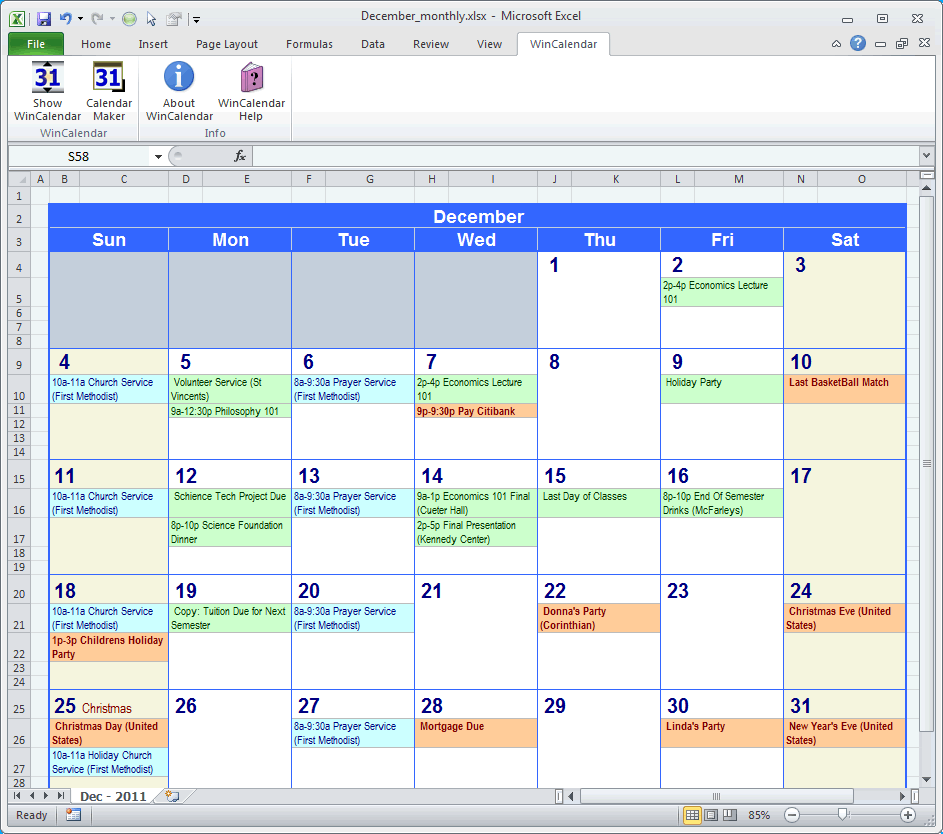
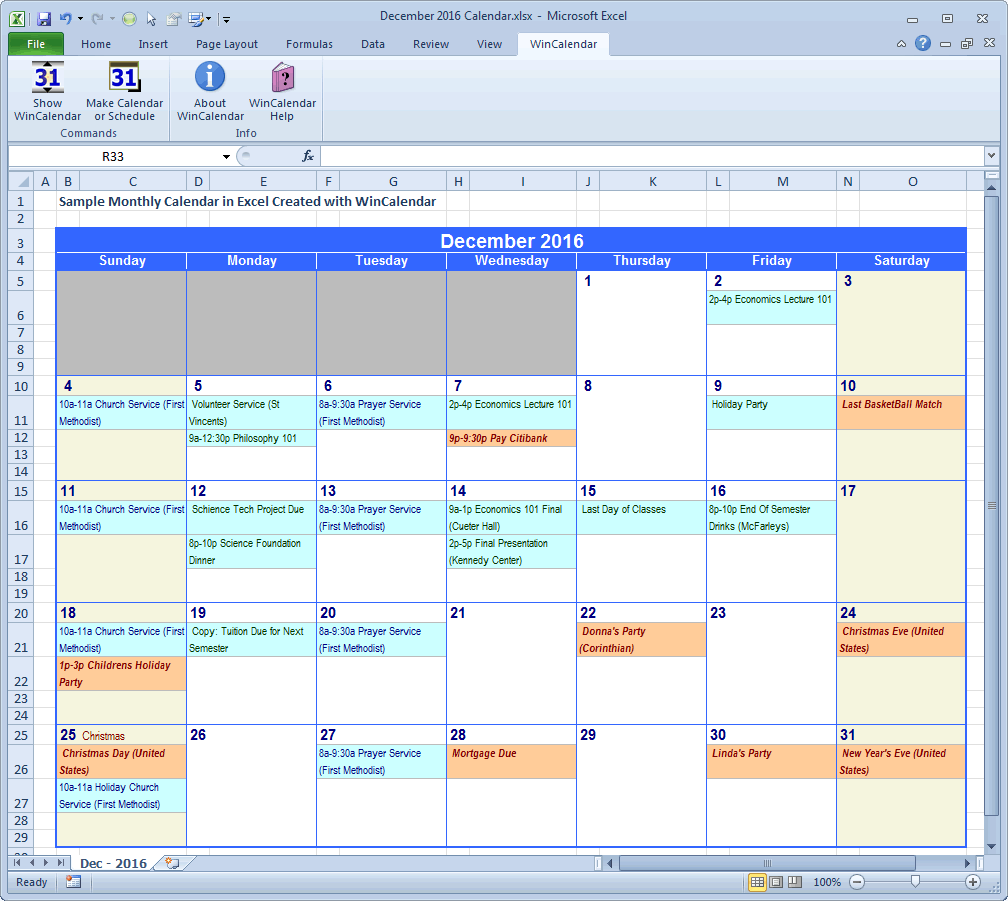
Holidays and Events: Add holidays and important events by creating a separate table with dates and descriptions. Use
VLOOKUPorINDEX/MATCHfunctions to link these events to the calendar, highlighting or displaying them in a separate column. -
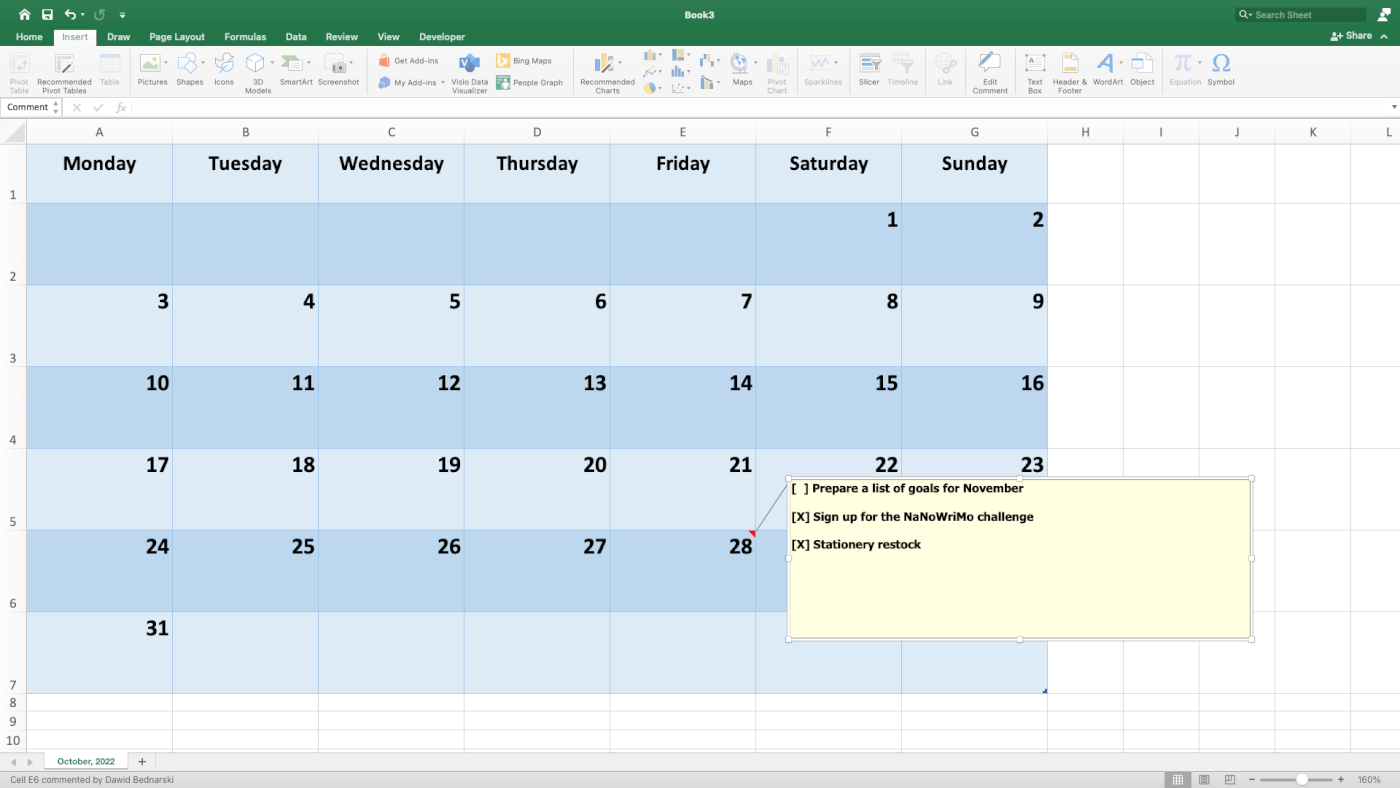
Scheduling and Tasks: Integrate task management by adding columns for tasks, deadlines, and status. Use conditional formatting to highlight overdue tasks.
-
Data Validation: Implement data validation to ensure that only valid dates are entered.
-
Charts and Graphs: Visualize data related to the calendar using charts and graphs. For example, you could create a chart showing the number of events per month.
-
Macros (VBA): For highly customized calendars, consider using Visual Basic for Applications (VBA) to automate tasks like generating calendars for multiple years or creating interactive elements.
Conclusion:
Creating calendars in Excel is a versatile skill with applications ranging from personal organization to complex project management. By mastering the techniques outlined in this guide, you can move beyond basic monthly views and design sophisticated calendars tailored to your specific needs. Remember that the key to effective calendar design lies in understanding Excel’s core functions and leveraging its formatting and conditional formatting capabilities to create a visually appealing and functional tool. The journey from a simple monthly calendar to a complex, dynamic planner is within your reach with the power of Excel at your fingertips. Experiment with different approaches, refine your designs, and unlock the full potential of Excel for your calendaring needs.


Closure
Thus, we hope this article has provided valuable insights into Mastering the Art of Excel Calendars: From Simple to Sophisticated. We thank you for taking the time to read this article. See you in our next article!